Kristen's mom made her a few t-shirt quilts when she was younger, and a few years ago Kristen made one for Nate (my brother-in-law). These are the most comfortable blankets, and anytime all of us would be at Kristen's house, we'd all claim those blankets if we were watching movies or something and needed a blanket to curl up in. They are the best! There is nothing like an old t-shirt and a comfy fleece blanket! These blankets combine those two very things.
Kristen sent us a tutorial a long time ago, and then we all recently decided we needed to make one big day out of it, with Kristen playing the teacher. Kristen rented a room at a local church so we could have plenty of room to work and spend all day concentrating on our quilts.
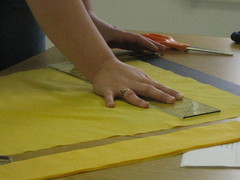
First, I cut out all my squares and strips. I used gold squares and black strips of fabric. The strips are for the sashing on the quilt and the squares are for the corners. The squares are 3.5x3.5 inches and the strips are 3.5x13.5 inches.


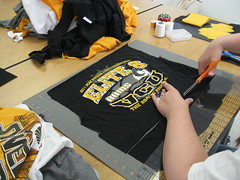
I cut out all of my tshirt squares. These are 13.5x13.5 inches. I had a lot of scraps left over, too.


Here I laid out all of the tshirt squares to get an idea as to where I should place all of them on the quilt.

Then, I laid out all my tshirt squares, little gold squares, and black strips to line everything up and see what it would look like.

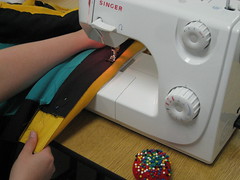
I sewed 4 gold squares to 3 strips.

And repeated 4 more times with the remaining gold squares.

Then I sewed 4 strips to 3 shirts, to make one row. And repeated that 3 more times, so I had 4 completed rows of shirts and strips.

Next, I sewed my rows of squares/strips to my rows of shirts/strips, and then I sewed all of those together to get this:

See? It's basically done! Except for the batting and fleece part. At this point I decided to iron everything to make sure there were no wrinkles on the sashing/squares/shirts. I also cut off extra thread that was sure to bother me later.
I laid out my big sheet of batting (I bought of a big roll of this stuff), then my big sheet of fleece (about 2 1/4 yards). I placed the tshirt part face down onto the fleece. I trimmed the extra fleece and batting, and left room for seam allowance. Then I pinned all three layers together.

Then, I sewed it all together (left a hole for later use), and then folded it up.


It was time to leave the church building we were in. We packed everything up and made our way to Kristen's house, where I turned my quilt right side out. First, the fleece part comes out, and then the shirt part comes out (so the batting is now in the middle). It was neat! You can kind of see in the top right corner the hole where everything got turned right side out from.

It took me about 12 hours to complete my quilt. Maybe less? We didn't leave Kristen's house until midnight, though. The day included everything from laughing and joking to almost crying, because of the frustration that sewing machines cause. There was one point where I almost ran out of the room crying, and another point where I almost picked up my machine and threw it out the church building window. Well, not almost, but I did have an image of that happening cross my mind. I did throw my bobbin hook across the table one time. And I did break a sewing machine needle. And slammed my fist down a time or two. I had to remain calm the whole time though, because we were in a church building. There were so many times when I could have yelled out some bad words, but since we were in a holy building, I figured I better not. And it looks like "someone" was on our side, since the machines started working again (after playing some musical machines), and all three of us were able to complete our quilts!!
Here are all three of our completed t-shirt quilts:

Mine is the VCU one, Bonnie made a WFLS one with all of her old radio tshirts, and Kristen made her husband Dave a JMU one, since he went to JMU. It was a lot of fun making them and I am really glad we were able to complete our project!! I am no longer afraid of my sewing machine!

LOVE! :)
ReplyDeleteI read a article under the same title some time ago, but this articles quality is much, much better. How you do this.. origami box
ReplyDelete