Saturday, December 31, 2011

2011 reflections

Since 2011 only has a few hours left, I thought this would be the perfect time to do a little wrapping up.

2011 was a great year. So many people we know would beg to differ, but we feel that it's been a very very good year for us.

For one, my husband started teaching piano, for real. He has a bunch of students and he teaches 2 days a week (and works at his other job the other 5 days a week). So, even though we don't get to spend as much time together as we'd like, he's working his way towards his real career, which is to teach piano full time. One of these days he will be there, teaching 5 days a week, and he can say "so long!" to his other job. For now though, we are making this work. It's a great opportunity, and even though we don't have the time together that we'd like to have, one day we will and can look back knowing it was all worth it.

We also started selling origami bouquets and such on etsy. We have a full wedding to do later on in the new year, and a few other bouquets have already been requested for 2012. I also started selling craft items and cake pops. This year I attended a few craft shows, and had my own booth/table, where I was able to sell some homemade/handmade items. They were fun experiences and I got to meet other local crafters/artists. I learned a lot from the shows I participated in and I hope to do even more in 2012.

We laid out all of our plans on the table. We've got goals and ideas ready to take off. Dreams are no longer dreams but are becoming reality. Anyone who knows me knows that I don't like to just say I'm going to do something, but I actually act on those things. I'm the kind of person who follows through, and 2011 has proven that. 2012 is going to prove it even more.


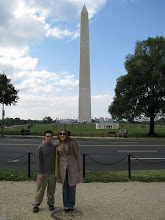
I would do a pictorial post, breaking down each month and such, but I think I'll just leave with one photo this year.


Picture 207


Happy New Year!

Friday, November 4, 2011

Chocolate Cameos

A while ago I made some molds from some of my cameos.

IMG_1479

These molds are food safe, so once they are cured and washed, they are ready to be used. I made these so I could make some cameo chocolates. I got the idea from this Country Living article I found from pinterest.


I'm not sure where you can purchase cameo shaped mold sheets from, which is why I made my own. The ones I made were just a test. I used this product, Amazing Mold Putty. I get it from the craft store with a 40% off coupon. It's not much in the containers but you actually do get a lot out of it.

What you do is you mix the 2 compounds together (just enough for whatever it is you want to make a mold of), and once they are combined, you press the object in the compound. Once it sets, you can remove the item, and then you have a mold. Once it cures you can wash it and then use it to make things like chocolates and such. Which is exactly what we do with it.


These are my two cameo chocolates made from my molds:

IMG_3214

They are not perfect but with a little more practice I can figure it out. I plan on making multiple cameo molds from the molding putty so I can make more than 2 of these at a time.

What I did was painted the cameo image first with white chocolate, and then I added the milk chocolate to the molds. Once they were set, I removed the chocolates from the molds. Cute!

IMG_3213

IMG_3212

Next time I will make sure the mold isn't filled so much, so the chocolates have flat backs. I can also trim the chocolates around the edges in case there is too much on them..imagine how pretty these would be in multiple colors, like the Country Living article shows. Would be great to make a box of them as a gift for someone, or for favors at a bridal shower.

I wanted to blog this so I could share it in the YHL pinterest challenge this month. Lots of great ideas over there!

Homemade Chicken Pot Pie

A favorite blog of mine shared a recipe for chicken pot pie (from scratch) a couple years ago. Since then I have made it a few times and it is delish.

Last night I made 2 pies for dinner, and one small one for lunches. I actually doubled the batch, but my instructions below only mention ingredients for one batch.

For the shell crust, take 1-2/3 cups of flour, 2 tsp of celery seed, 1 8oz. package of cream cheese, 1/3 cup of butter, and 1/4 tsp of salt and mix together to form dough. (I doubled all of this)

IMG_3224


I lightly floured a surface and rolled mine out with a rolling pin. Then, I placed the doughs in the dishes I was baking with.

IMG_3226


I cubed some boneless skinless chicken breasts (about three large ones) and cooked those through, then I put them in my food processor and shredded it up really nice.


While the chicken was cooking, I minced some garlic (about 2 tsp) in the processor first. I melted 1/3 cups of butter in a pot on the stove, and added the garlic, 1/2 tsp of salt, some pepper, and 1/3 cup of flour. After that was blended, I slowly added 1-1/2 cups of warm water, 2/3 cups of milk, and 3 chicken bouillon cubes. Once this came to a boil and thickened up, I turned off the heat and stirred in the shredded chicken, and 1 cup of frozen mixed vegetables and 1 cup of frozen hash browns (small cubed up white potatoes). (I doubled all of this)


IMG_3242

Once that was all mixed together, I filled all the dishes with it. I think next time I will add more mixed veggies.

IMG_3244

And then I rolled out the rest of the dough and topped the pies, using a fork to secure the edges. I also cut slits in the tops of the pies.

IMG_3245

I baked these for about 20 minutes at 425 degrees Fahrenheit. They came out perfectly!

IMG_3253


The larger one is being frozen for future meals and the round one was dinner last night and it will be dinner the rest of the weekend most likely. The small one is perfect for lunches (actually makes 2 lunches because it's so much).

Fall is the time of year to make cozy warm meals like this. Chicken pot pie from scratch is one of my husband's favorite meals. He doesn't even like cream cheese, but he loves the dough this recipe makes (you can't taste the cream cheese at all). These would be great made as individual pot pies and frozen. Thanks to Sunday Baker for a great recipe!


Monday, October 31, 2011

Happy Halloween!!

Happy Halloween!!

This year we carved 3 pumpkins and 1 turnip.


IMG_3199

The Kanji one is "face" in Japanese.


Why did we carve a turnip? That's because of Jack of the Lantern.

IMG_3194

The story behind Jack'o'lanterns is here: http://merganser.math.gvsu.edu/myth/jackothelantern.html

Basically, Jack tricked the devil into promising not to take his soul. When he died he was in limbo between heaven and hell, because he wasn't good enough for heaven and the devil promised not to bring him to hell. He was given an ember from the devil so he could see while he was wandering around in the dark. He put the ember in a carved out turnip and held it like a lantern. He became known as Jack of the Lantern. It's an old Irish folk story, and I love it.


I also made some pumpkin cake pops. They are various flavors (next time I will have to actually make pumpkin bread or cake ones). Someone ordered 2 dozen from me for a Halloween party and I brought the rest to work to give out as treats for Halloween.

IMG_3206

We decorated our front window with origami bats:

IMG_3198


Even Beethoven at home has some Halloween spirit!

IMG_3176


I made some apple butter with the rest of my apples from the orchard:

IMG_3187

And canned it for some friends:

IMG_3191

And I roasted some pumpkin seeds and flavored them with cinnamon and sugar:

IMG_3188

They are delicious!


On Saturday, after I delivered the 201+ cake pops that a bride ordered for her wedding, I saw this amazing sunset.

IMG_3165


And speaking of those wedding cake pops, here they are:

IMG_3161

Thursday, October 13, 2011

Apple Picking!

Last Saturday my pal David and I headed out to Grave's Mountain to attend the apple harvest festival and to pick apples in the orchard!

g2

It was opening day for the festival, so there was a line of traffic waiting to get there, but we made it around 11am. We parked and trekked across the way to where the festival was. We checked out the vendors and joked about all of the tchotkes and other things we saw there. We did see a few things we liked, too.

Like these gold/silver dipped leaves turned into pendants:

g5

I really liked the ginkgo leaf pendants she made and I'm sure I could make them myself. I saw some liquid metal (gold, silver, etc) on QVC a few years ago and thought it would be neat for something like this. Guess that's what the vendor was doing. Either way the pendants looked great!


After we were done looking around the festival and taking photos, we headed over to the orchard. It was a little bit of a walk and we stopped to check out the petting zoo before we continued on..


Pigs on the way to the apple orchard:

gm5


Almost to the orchard:

g7

Once we got there we picked up a half bushel box and made our way to the aisles and aisles of apple trees and started picking!

Gorgeous view:

gm6


View of the mountain:

o


David in the orchard:

db

Some scenery at the apple orchard:

shed

scale

We ended up with a half bushel and David took the ones he picked (he didn't want too many of them). We got a variety of fuji, golden and red delicious, stayman, and others. The fujis are my favorite! As my friend Anna says, I have never met a fuji apple I didn't like!

My half bushel of apples:

IMAG0124


We also stopped at the road side stand when you leave the orchard to pick up some little gourds and mini pumpkins. One of the little pumpkins is on my desk at work. For some reason I find them really cute.

My gourds/mini pumpkins:

IMAG0126

So, it was a great day with David, who was visiting Richmond for the weekend. We had a great time catching up and enjoying the weather. It was a mini adventure walking around the apple orchard trying to find good apples to pick, but we had a great time.

Tuesday, October 11, 2011

Some photos

One of my last harvests of my cherry tomato plant:

IMAG0123

Half a bushel of apples from Graves Mtn Orchard:

IMAG0124


Crock pot stew:

IMAG0121


Bubblecake Bake Shop in Roanoke, VA (delicious cupcakes):

IMAG0116


Cute little pumpkin soup crocks from World Market:

IMAG0107


Homemade pumpkin spice and vanilla sugar hand scrub, made by me for a friend's birthday:

IMG_3072

Cookies for Kids' Cancer

IMG_2957


Last month I participated in a Richmond city-wide bake sale. I baked several dozen cookies and packaged them in packs of 3 for a recommended donation of $5. 100% of the proceeds went to a non-profit organization called Cookies for Kids' Cancer, which funds pediatric cancer research.

IMG_2955

IMG_2961


CFKC was founded by a mom who lost her son to cancer at the young age of 6. You can read all about it and the great things CFKC does on their website here: http://www.cookiesforkidscancer.org/

Cookies for Kids' Cancer mission statement:

Cookies for Kids' Cancer is committed to raising funds to support research for new and improved therapies for pediatric cancer, the leading cause of death by disease for children under the age of 18. Through the concept of local bake sales, Cookies for Kids' Cancer provides the inspiration and support for individuals, communities, and businesses to help fight pediatric cancer.


IMG_2921

I thought it was for a great cause, and I love to bake and share my baked goods with others, so I thought it would be a great excuse to get in the kitchen, bake & package some delicious cookies, and collect donations for the organization. I got to meet so many wonderful people and hear so many touching stories. It was a really sweet day and I hope that everybody enjoyed their cookies as much as I enjoyed helping raise money for the cause.

IMG_2956

I volunteered to work the Ellwood Thompson's table and my friend Anna joined me. We had a great time. My cookies were gone within the first hour after I arrived, so next year I need to double or triple the batch. I made oatmeal raisin cookies and chocolate chip cookies. People loved them and the packaging was really cute.


IMG_2938


IMG_2945


IMG_2950


Any individual can host their own bake sale for the cause. Just check out the CFKC website to find out how you can do it and where to send the donation money to. It's a great idea!


IMG_2959

Update on the ugly light fixture in our nook

Here are some better photos of the ribbon chandelier I made over the summer to cover up the ugly light fixture in our nook. I'm sure people think this is ugly too, but it is 100x better than what it looked like before. I like the way it gives off a glow at night!


IMG_2203


IMG_2205


I used double sided tape to secure each ribbon strand to a wooden embroidery hoop. We then hung it up with thread and some eye screws (into the ceiling) and made sure that no part of the ribbon chandelier is touching the ugly old light fixture.

IMG_2201

I had a bunch of scraps of ribbon and spools I hadn't used so I just made a sort of pattern to go all around the hoop, making sure I cut each piece to the same size. I like it a lot! It's way better than the old fixture before.