Wednesday, February 9, 2011

Signs

Last Sunday, I drove up to Fred to join my sister Bonnie & co (Kristen, Melissa, Sharon, Crystal) at an antique/flea show. It was huge and there were a lot more (and better) vendors this year than last year. We had a good time strolling up and down the aisles checking out all of the booths. One booth had a bunch of old printers drawers and wood block letters/stamps. When Melissa and I saw it, we both gasped. Melissa immediately started rummaging through the letters and decided to make a sign for her last name/family. She got an old cheese box from the guy and carefully picked her letters. Of course I had to do the same because I have wanted a sign with our last name and wedding date.


IMG_0009

My sign. I had to settle for just 2008, since there were slim pickings on the 1's. This will do though. I already had a cheese box at home that my sister got from Amish country in OH several years back.


IMG_0007

Melissa's sign. How cute?!

IMG_0006

Kristen's sign. She put her wedding year on it too. I like it because all of the letters fit perfectly in the little mini drawer.


IMG_0012

I bought these little salt jars for $1 at the show. They are so cute. I have one by the kitchen sink on the windowsill for rings when washing/cooking if I don't want to wear my rings.

IMG_0010

This is all I bought at the show. The drawer is a mini version of the bigger one of mine that I turned into a jewelry display. I will do something similar with this one. Bonnie got an antique microphone to add to her mic collection. Sharon got a heavy garden turtle. Kristen & Sharon both got a neat little French spice container. I can't remember what the other girls got besides the signs. It was fun!


After the show everyone headed to Olive Garden to have a birthday lunch for Melissa. I brought cake pops for dessert.

IMG_0003

Cake pop bouquet in a little mason jar.


IMG_0001

Bright pink birthday cake pops!

We ended the day at Hallmark for last minute Valentine's Day goods. It was a good Sunday.

2. A picture of you and the person you have been closest with the longest


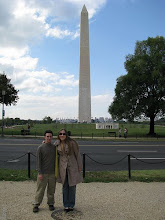
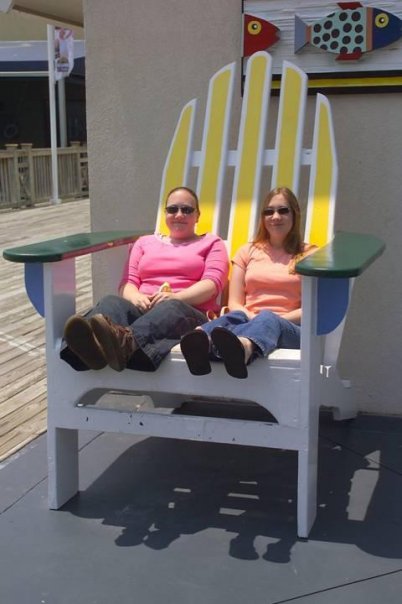
This is a photo of my sister Bonnie & I from 2004 at Myrtle Beach. We took a big trip with our friends that May for about a week. It was a lot of fun.

I chose this photo because it's totally us. I have been closest to my sister Bonnie longer than anyone else in my life. I could easily have put Daniel on this post, but nothing can compare to a sister. We grew up together, shared rooms and all. Typical sister things.

I am sure I was an annoying little sister (probably still am), but I always looked up to her (and still do). Now that we are both adults with our own lives we don't see each other so much anymore. It's still nice to get together and spend time together when we do, though.


Thanks Bonnie!!

Tuesday, February 8, 2011

1. A picture of yourself with 10 facts


1- I have a twin brother who is a US marine. We're obviously fraternal, but people still ask if we can feel each others' pain. No.

2- I could read and spell words by the age of 4. I remember the first book I ever read, and the first word I ever spelled on my own.

3- I love my job, especially the historic house my office is in. The people I work with are wonderful and the people I help every day make it that much more enjoyable.

4- I'm actually very good at singing. Most people that know me have no idea. I have an amazing ability to recognize notes and start naming pieces/songs they are in. It's really easy for me to make up new tunes, too.

5- My husband and I understand each other more than most people understand anyone. Probably more than most people understand anything.

6- I have never had beautiful long nails, and I have only had one real manicure my entire life. I'm not sad about it.

7- My ears are not pierced and never will be. And that's fine.

8- I have two crowns on my head (two hair parts). It's actually not cool at all.

9- My eyes are green and I love them.

10- One day I want to visit the Greek Islands.

30 days, 30 pictures

30 days, 30 pictures


I'm going to participate in the 30 days 30 pictures challenge. Another blogger friend of mine is doing this so I thought why not? Here are the entry topics for each day:


1. A picture of yourself with 10 facts
2. A picture of you and the person you have been closest with the longest
3. A picture of the cast from your favorite show
4. A picture of your favorite night
5. A picture of your favorite memory
6. A picture of a person you'd love to trade places with for a day
7. A picture of your most treasured item
8. A picture that makes you laugh
9. A picture of the person who has gotten you through the most
10. A picture of the person you do the most screwed up things with
11. A picture of something you hate
12. A picture of something you love
13. A picture of your favorite band or artist
14. A picture of someone you could never imagine your life without
15. A picture of something you want to do before you die
16. A picture of someone who inspires you
17. A picture of something that has made a huge impact on your life recently
18. A picture of your biggest insecurity
19. A picture and a letter
20. A picture of somewhere you'd love to travel
21. A picture of something you wish you could forget
22. A picture of something you wish you were better at
23. A picture of your favorite book
24. A picture of something you wish you could change
25. A picture of your favorite day
26. A picture of something that means a lot to you
27. A picture of yourself and a family member
28. A picture of something you're afraid of
29. A picture that can always make you smile
30. A picture of someone you miss

Friday, February 4, 2011

Cook's Illustrated prints..

Okay..so a few entries back I mentioned how I wanted to frame some of my favorite Cook's Illustrated prints and hang them in the kitchen. Well, I did it!


I framed 4 and hung them up so far. They are cute. The backs of the Cook's Illustrated magazines always have such awesome prints.


Here are mine all framed and hanging:

IMG_9976


IMG_9968


IMG_9974


IMG_9973


Also, we hung up some other pieces around the place. Above the couch we have this (and I have 2 big frames to hang up next to it with 2 big prints of some of our NYC photos):


IMG_9969


Along the stairs we have a wall full of framed family photos. On the opposite wall along the stairs we have started a wedding wall and I have added this:

IMG_9977

(We have other frames up on the wedding wall, which I'll share later.) My sister Natalie gave the frame to us this past Christmas and I wasn't sure what to do with it. I recently figured out it would be great for our wedding wall. Thanks Natalie!


And this is hanging on the wall above Bob's tank:

IMG_9979


I'll share some photos of the family wall and more of the wedding wall later.

Tuesday, February 1, 2011

Happy February!

Happy February!

IMG_9926


Last night I made the rest of the cake pops..I think it's an addiction now. They are so much fun to make and give to people.


I tried a little something else with the VCU ones...


IMG_9936

Monday, January 31, 2011

Cake Pops!

My friend David was asking me for fundraising ideas last week for his student organization, and I was thinking it would be neat if his group made cake pops and sold them for $1 each. They could make them in VCU colors (black & gold..or yellow since gold candy coating is hard to find).

Bakerella (bakerella.com) is awesome and I love her cake pops. They are perfect for any little occasion especially if you want to do something new or different, besides the old cupcake/cake routine.

I made some yesterday as a test run to show David and get his thoughts on them.

Here are my step by step instructions:

IMG_9887

Get a boxed cake mix and tub of frosting. I used devil's food cake mix.


IMG_9886

Bake the cake!


IMG_9888

Put the cake in the oven. Takes about 30 minutes to bake in a 13x9 pan.


IMG_9889

Wash up while you are waiting.


IMG_9891

Look at your reflection in your favorite pyrex bowl.


IMG_9892

Make sure the cake is done after the timer goes off. Let it cool!


IMG_9893

Once the cake cools completely, crumble that thing up!


IMG_9894

Then, mix 3/4 of the frosting in with the cake crumbliness.


IMG_9896

Roll the cake mixture into balls. You should get about 4 dozen. I got 40.


IMG_9897

Pop 'em in the freezer for 15 minutes. Or cover them and place them in the fridge for a couple hours, if you can wait that long.


IMG_9898

Get your candy chips in your second favorite pyrex bowl. I used yellow, since VCU's colors are black & gold.


IMG_9899

Melt those chips down! You can heat them in the microwave on 30 second intervals. Keep stirring in between intervals until melted. Don't burn them. You want a smooth consistency that is not thick.


IMG_9900


Dip the end of the stick in the melted candy coating. Then pop it in the ball (don't go through the top!). Dip the ball in the candy coating to cover it completely and then tap it on the side of the bowl to get the excess coating off. Stick in a styrofoam block to dry.


IMG_9901

Cover with sprinkles of your choice. When dried, you can write on them with edible markers (food coloring markers). I have some and will try that later.


IMG_9902

It's okay if you mess up one one. You can try to fix it or you can eat it. Or something.


IMG_9904

Wrap 'em up! I use little treat bags to wrap them, and then tie them off with a twist tie. The twist tie package they sell at craft stores comes with 50, but they are big enough you can cut them in half to get 100. The bags are sold in all sizes and usually packs of 50 or 100. The sticks you can get at the same place..as well as the candy coating. The candy coating tastes like white chocolate.

I tried making cake pops in the past with regular chocolate but it doesn't work the same way because the consistency of the chocolate is too thick compared to the candy coating.


Anyway, I hope David and his group like the cake pops and it will be fun to see these around campus.